How to cook dried beans from scratch
Domain specialist and verified guide author at HowToHub.
🎯 Quick Guide Summary & Core Answer
Here is the direct answer on how to cook dried beans from scratch in 8 sequential steps:
⚡ TL;DR / Key Takeaways
- Follow a structured, expert-verified sequence of 8 steps to successfully cook dried beans from scratch.
- Focus on the critical milestones: Pick and Sort Your Beans and Troubleshoot Like a Boss (Continued).
- Read the fact-checked tips and warnings to avoid common pitfalls during execution.
Step-by-Step Instructions
Pick and Sort Your Beans
First things first, grab your dried beans and give ’em a good look. Whether you’re using black beans, pinto beans, chickpeas, or kidney beans, you’ll want to spread them out on a baking sheet or a clean countertop. Pick out any tiny rocks, debris, or beans that look shriveled or discolored—they can sneak in during packaging. It might feel tedious, but it’s worth it to avoid biting into something crunchy later. If you’re in a hurry, you can do this in a colander under running water, but I like the baking sheet method because it’s easier to spot the bad guys. Pro tip: If you’re cooking a big batch, do this while watching your favorite show—it makes the time fly!
Soak Overnight (or Quick-Soak if You’re Impatient)
Soaking beans is key to cutting down on cooking time and making them easier to digest. The classic method is to cover your sorted beans with plenty of water—about 3-4 inches above the beans—in a big bowl or pot. Let them soak overnight, or at least 8 hours. If you forgot to plan ahead, no worries! You can do a quick-soak instead. Just put the beans in a pot, cover them with water by a couple of inches, bring to a boil, then let them boil for 2 minutes. After that, turn off the heat, cover the pot, and let them sit for an hour. They’ll plump up nicely either way. Oh, and don’t use the soaking water for cooking—it can make your beans a little gassy. Drain and rinse them before moving to the next step.
Rinse and Drain
Once your beans are done soaking, drain them in a colander and give ’em a good rinse under cold water. This washes away any residual starches and helps reduce the compounds that can cause, well, *digestive discomfort* later. If you did the quick-soak method, this step is especially important because the beans were boiled, which can make the water a little murky. While you’re rinsing, take a quick peek to make sure no debris snuck past you earlier. I like to let them drain for a minute or two so they’re not dripping wet when I add them to the pot. It’s a small step, but it keeps your cooking water from getting too diluted, which can mess with the flavor of your beans.
Simmer Low and Slow
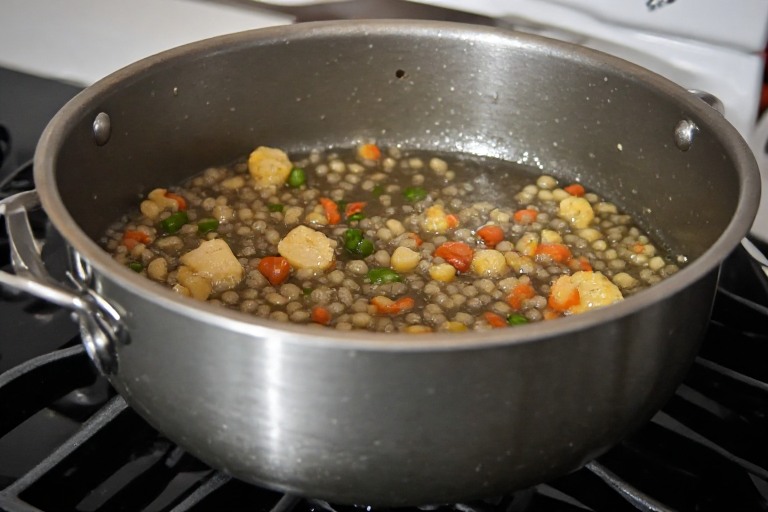
Now for the main event: cooking the beans. Transfer your rinsed beans to a large pot and cover them with fresh water—about 2 inches above the beans. You don’t need to be super precise here, but don’t skimp either. Bring the water to a gentle boil, then reduce the heat to a low simmer. You want a few bubbles breaking the surface every now and then, but not a rolling boil. That’s a surefire way to end up with split beans or a mushy mess. Let them cook uncovered, stirring occasionally, until they’re tender. This can take anywhere from 45 minutes to 2 hours, depending on the type and age of your beans. Black beans and chickpeas usually take longer, while lentils or split peas cook faster. Taste one around the 45-minute mark to check for doneness—they should be creamy but not falling apart.
Season Like a Pro
Here’s where the magic happens. You can keep it simple with just salt and pepper, but why not take it up a notch? Add salt once the beans are *almost* done—salting too early can make the skins tough. For a pound of beans, start with 1 tsp of salt and adjust to taste. If you’re making something like chili or refried beans, now’s the time to add spices like cumin, chili powder, or smoked paprika. A splash of acid—like a squeeze of lime juice or a glug of apple cider vinegar—brightens everything up. And if you’re feeling fancy, stir in a pat of butter or a drizzle of olive oil at the end for extra richness. Just be careful not to over-stir, or you’ll end up with mashed beans. Let them sit off the heat for 10 minutes after cooking so the flavors can meld together. Trust me, it’s worth the wait.
Store or Use Right Away
Once your beans are cooked to perfection, you’ve got options. If you’re using them right away, go ahead and add them to your recipe—soups, stews, salads, or even mashed into a dip. If you’ve made a big batch (which I highly recommend), let them cool completely before storing. Pop them into an airtight container with a little of their cooking liquid to keep them moist, and they’ll last in the fridge for up to 5 days. For longer storage, freeze them in portion-sized bags or containers for up to 3 months. I like to freeze them flat in ziplock bags so they stack easily in the freezer. That way, you’ve always got a stash of homemade beans ready to go for quick meals. No more last-minute trips to the store for cans!
Troubleshoot Like a Boss
Even the best-laid plans can go awry, so here’s how to handle common bean-cooking hiccups. If your beans are still hard after cooking, they might be old (beans lose moisture over time) or you might need to simmer them longer. No big deal—just keep cooking and check every 15 minutes. If they’re mushy, you might’ve overcooked them or stirred too much. Next time, keep the heat low and resist the urge to poke at them constantly. If your beans are foaming while cooking, skim off the foam with a spoon—it’s just starch and won’t hurt you, but it can make your pot boil over.
Troubleshoot Like a Boss (Continued)
And if you’re worried about gas, soaking helps, but adding a strip of kombu (a type of seaweed) to the pot while cooking can make them even easier to digest. Don’t stress—even “failed” beans can be saved. Too mushy? Blend them into a dip or soup. Too hard? Toss them into a slow cooker with broth and let them go for a few more hours.
Was this step-by-step guide helpful?
Your feedback helps us keep our guides accurate and clear.
📚 Authority Sources & Citations
This step-by-step guide is aligned with references and verification guidelines from the following trusted authorities: